
A conductivity meter is an essential precision testing instrument widely used in laboratory analysis, water quality monitoring, industrial solution detection, pharmaceutical production, and environmental protection testing. It measures the electrical conductivity of liquids to reflect water purity, solution concentration, and ion content directly. Unlike ordinary testing tools, conductivity meters have strict operating standards; irregular use will lead to drifting, unstable, or deviated readings, affecting experimental data accuracy and industrial production quality control.
Most operators, laboratory technicians, and factory maintenance staff often encounter various problems when using conductivity meters: whether calibration is required before use, how to obtain stable readings, how to handle probe failures, and how to select standard calibration solutions. Written by a senior industrial testing and laboratory engineer from Tool.com, with 10+ years of practical experience, this article answers all high-frequency questions about conductivity meter use, covering standard operating procedures, error troubleshooting, professional skills, and daily maintenance, fully compliant with industrial testing standards.
1. How Do You Use a Conductivity Meter Step by Step?
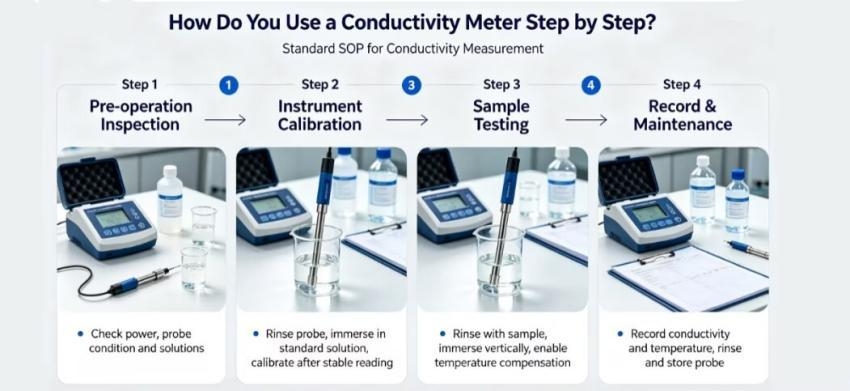
Standard conductivity meter operation follows a fixed industrial SOP, divided into pre-use preparation, instrument calibration, sample testing, and post-use maintenance. The complete professional steps are as follows:
Step 1: Pre-operation inspection
Check the instrument battery or power supply to avoid low power causing data deviation. Inspect the conductivity probe for dirt, crystallization, air bubbles, or damage to the electrode film. Prepare standard calibration solution and the liquid sample to be tested, and place all solutions at a stable room temperature for standby.
Step 2: Instrument calibration (mandatory before formal testing)
Select a matched standard calibration solution according to the sample’s conductivity range. Rinse the probe with pure water first to remove residual impurities, then immerse it completely in the calibration solution. After the reading stabilizes, complete automatic or manual calibration to ensure the instrument’s basic accuracy.
Step 3: Sample testing operation
Rinse the calibrated probe with a small amount of the test sample to eliminate the influence of residual calibration solution. Immerse the probe vertically into the sample liquid, ensure no air bubbles adhere to the electrode, and place the solution static without vibration. Turn on the temperature compensation function and wait 3–5 seconds for the data to stabilize.
Step 4: Record data and finish testing
Record the stable conductivity value and corresponding temperature data. After the test, rinse the probe thoroughly with pure water and keep it properly stored to complete the whole operation process.
2. Do You Need to Calibrate a Conductivity Meter Before Use?
Calibration is mandatory for accurate conductivity testing, and no uncalibrated instrument can be used for formal detection. The conductivity probe is a sensitive electrode sensor that is easily affected by environmental temperature, liquid residue, electrode aging, and cleaning conditions, leading to offset parameters.
For daily laboratory and industrial testing, formal calibration is required in the following scenarios: first use after startup, long-term idle (more than 7 days) reuse, probe replacement, after cleaning the electrode, and before precision testing and data filing. For daily continuous use, calibration is recommended once a day to ensure long-term data stability.
3. What Solution Do You Use to Calibrate a Conductivity Meter?
Conductivity meter calibration requires professional standard buffer solutions with fixed conductivity values. Different solutions are selected according to the test sample range, which is the core standard of professional calibration:
- 84 μS/cm solution: Suitable for high-purity water testing, such as purified water, distilled water, and laboratory ultrapure water calibration
- 1413 μS/cm solution: The most commonly used universal calibration solution, suitable for conventional tap water, surface water, and general industrial water testing
- 12880 μS/cm solution: Suitable for high-concentration solutions, such as chemical solutions, brine, and industrial concentrated liquid testing
It is strictly forbidden to use self-prepared solutions or expired standard solutions for calibration; otherwise, the instrument baseline will deviate permanently.
4. What Is Temperature Compensation in a Conductivity Meter?
Temperature compensation is the most critical professional setting for conductivity testing and the main reason for inaccurate data for novice operators. The conductivity of liquid ions is highly sensitive to temperature: the higher the temperature, the stronger the ion activity, and the higher the conductivity value, which will cause data deviation of 2%–3% per 1℃ temperature change.
The temperature compensation function of the conductivity meter automatically converts the measured value to the standard value at 25℃ (international standard temperature), eliminating temperature interference. In formal testing, automatic temperature compensation must be turned on; only special high-precision experimental scenarios require manual temperature correction and uncompensated original data recording.
5. Why Is My Conductivity Meter Reading Unstable or Fluctuating?
Unstable floating readings are the most common fault in use. Combined with on-site engineering experience, the core causes and targeted solutions are summarized as follows: Air bubble adhesion: Air bubbles on the electrode surface will isolate the liquid contact, resulting in jumping data.
Solution: Gently shake the probe after immersion to completely remove bubbles.
Unstatic solution environment: Liquid vibration, flow, or stirring during testing will affect ion stability. Solution: Keep the sample static and test in a stable environment. Electrode contamination: Long-term use will produce scale, crystallization, and oil stains on the probe, affecting sensor sensitivity.
Solution: Clean the electrode with pure water or professional cleaning solution.
Low power or aging probe: Insufficient power causes unstable circuit signals; aging electrodes lead to poor induction.
Solution: Replace the battery or calibrate repeatedly; replace the probe if the fault persists.
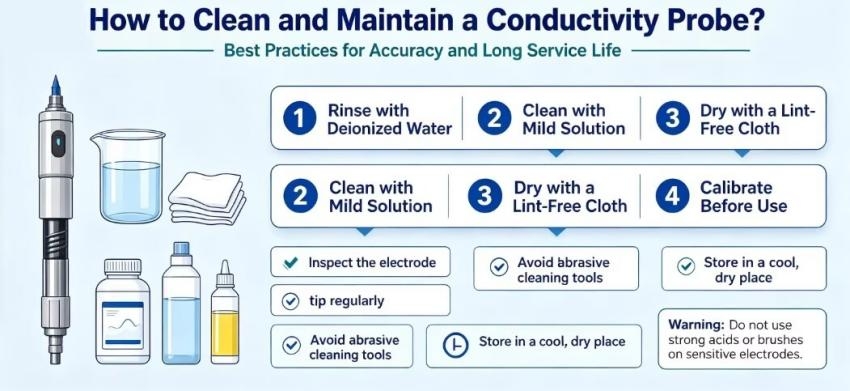
6. How to Clean and Maintain a Conductivity Probe?
The conductivity probe is a precision vulnerable part, and daily maintenance directly determines the service life and test accuracy. Professional maintenance standards are as follows:
Daily cleaning: After each use, rinse the probe fully with ultrapure water to avoid residual solution crystallization and electrode corrosion. Do not wipe the electrode surface with hard paper towels to prevent scratching the sensitive film. Regular deep cleaning: For probes contaminated with scale and oil, soak them in dilute hydrochloric acid or professional electrode cleaning solution for 5–10 minutes, then rinse with pure water to restore sensitivity.
Standard storage method: Short-term storage can keep the probe wet with a small amount of pure water; long-term storage requires drying and sealing storage to avoid mold and electrode oxidation. Never store the probe in a dry environment for a long time after wet contamination.
7. How to Read Conductivity Test Results Correctly?
Standard reading rules are key to standardized data recording. Do not capture data immediately after immersion. After placing the probe stably and turning on temperature compensation, wait 3–5 seconds until the screen data stops floating and is completely stable.
It is necessary to record theconductivity value + test temperature simultaneously to ensure data traceability. For high-precision experiments, repeat the test 2–3 times and take the average value to eliminate accidental errors. Distinguish unit differences: common units are μS/cm and mS/cm, avoid unit reading confusion leading to data misjudgment.
8. What Are Common Mistakes When Using a Conductivity Meter?
Summarized from years of on-site engineering debugging, the most frequent non-standard operations that affect accuracy are as follows:
- Skipping calibration and testing directly, resulting in overall data deviation
- Ignoring air bubbles on the electrode surface, causing fluctuating readings
- Forgetting to turn on temperature compensation, leading to temperature error
- Using expired or mismatched calibration solutions
- Wiping the electrode hard, damaging the sensor film
- Testing in vibrating and flowing liquid environment
Conclusion
Using a conductivity meter correctly is not only a basic operational skill for laboratory and industrial testing personnel, but also the premise of obtaining accurate, compliant, and traceable detection data. Standard pre-use calibration, correct probe immersion and degassing, mandatory temperature compensation, and scientific daily maintenance can effectively avoid most test errors and instrument failures. Following professional engineering operating standards ensures long-term stable operation of the conductivity meter and guarantees the authenticity and accuracy of water quality monitoring and solution detection data.